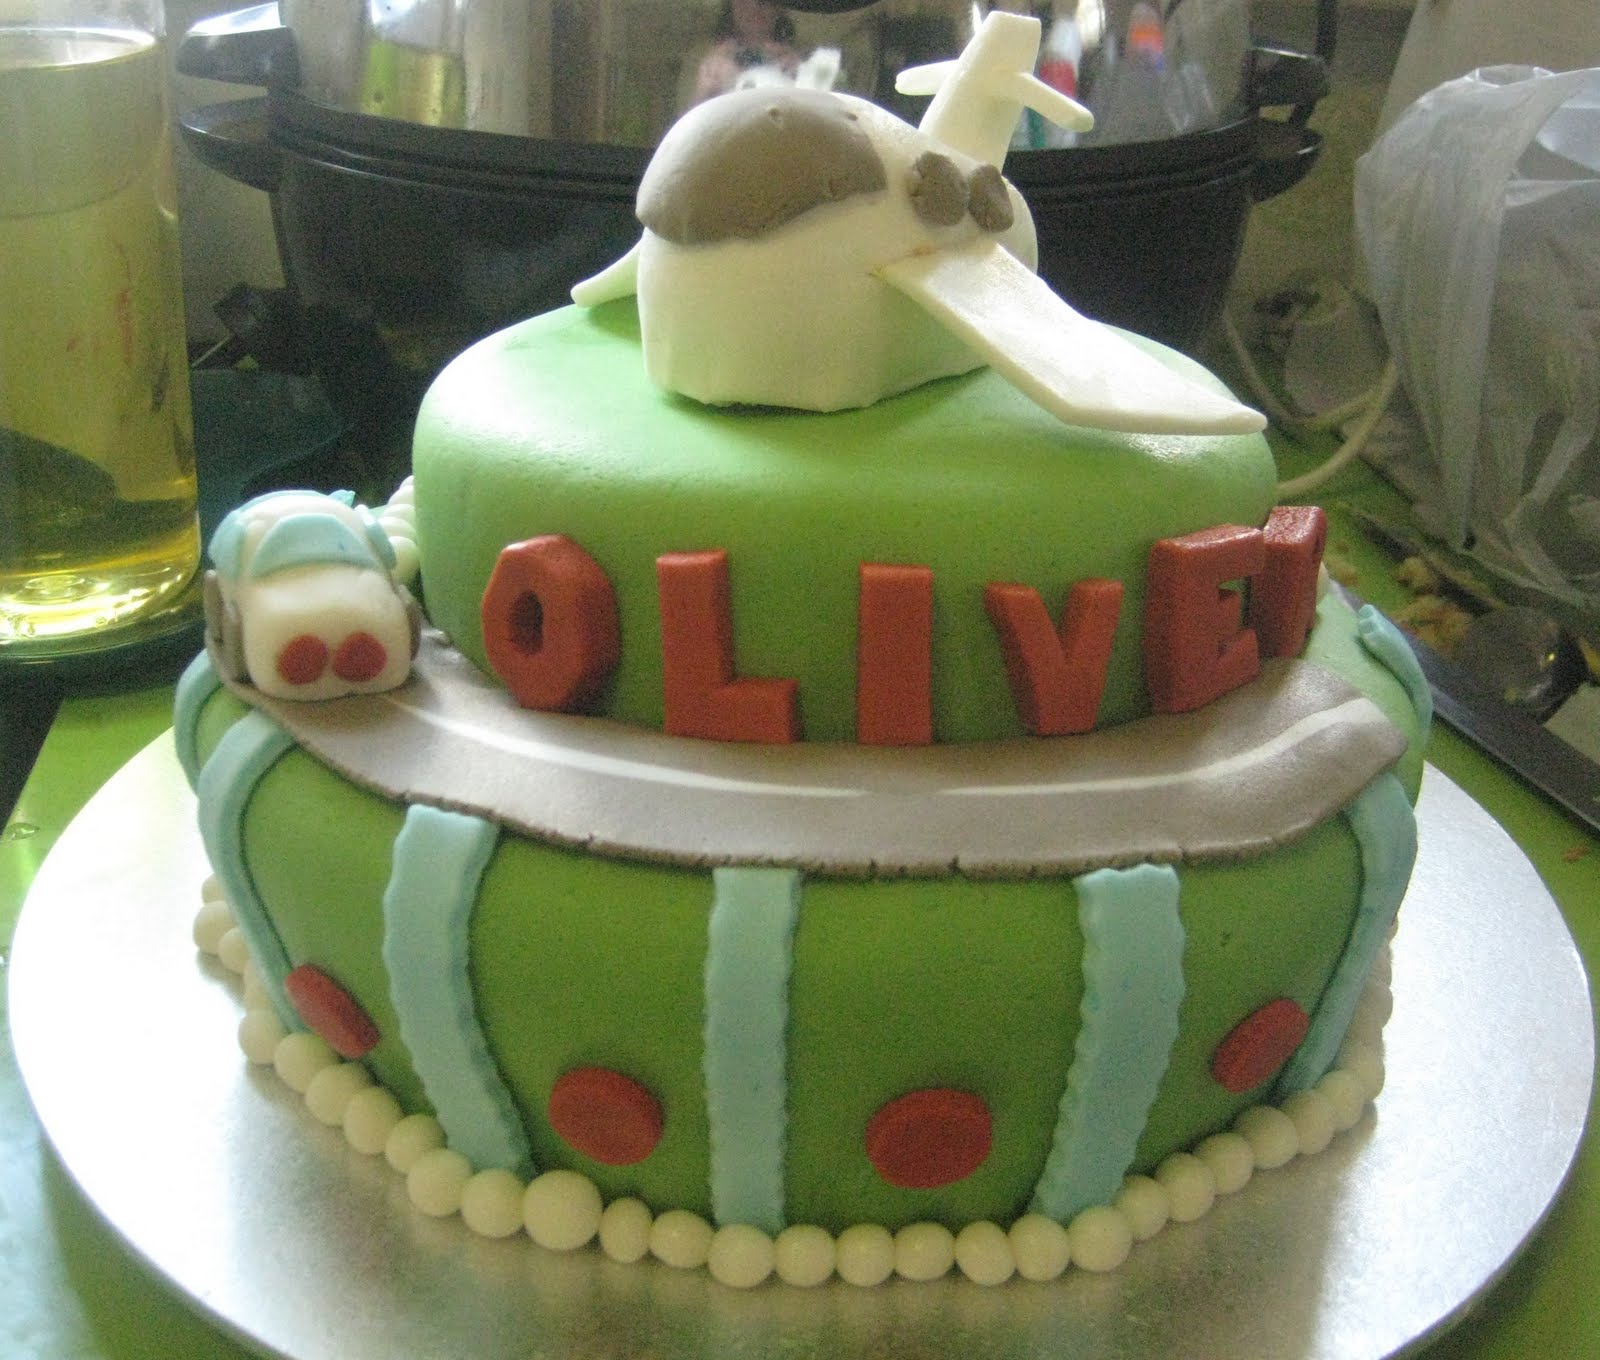
This was for a 5th Birthday Cake. Fondant planes are not my strong suit obviously. lol But i was pleased with how it turned out. And the little boy liked it so that is the main thing :)
Thursday, March 17, 2011
Thursday, March 03, 2011
Sorry I've been busy these last couple of months! I've been getting into my hair accessory business and having some good sales. I even have a Facebook page now. :) I've also been making cakes!
It was Ethan's birthday and he wanted a Harry Potter cake so i made The Monster Book of Monsters. The first thing to get eaten was his eyes. lol followed by his teeth. I think he is pretty cute!

I also made a cake for my friends baby shower. She had a little boy. the colouring is off in the photo but you get the idea. The elephant is adorable. I'm still getting the hang of draping the fondant.Thursday, January 27, 2011
Raspberry Apple Streusel Custard Pie

I got a Kenwood Patisserie Mixer for Christmas. Holy exciting! So i've been busy using it for all sorts of things. Yesterday was Australia Day so while Graham was bbqing our dinner i whipped up this pie. I changed a couple of things and it became Raspberry Apple Steusel Custard Pie! I did every step in my mixer and it came out wonderfully. This recipe is definately a keeper!
Ingredients
- 1 uncooked pie crust - i used half of this recipe. ps i LOVE Jamie Oliver
- 1 can condensed milk
- 1 teaspoon ground cinnamon
- 2 large eggs, beaten
- 1/2 cup hot water
- 1 1/2 cups frozen raspberries
- 1 medium all-purpose apples, peeled and sliced
- 1/2 cup firmly packed brown sugar
- 1/2 cup plain flour
- 1/4 cup butter, softened
- 1/2 cup chopped nuts (optional) i left them out.
Method
Preheat oven to 200C
1.Roll your pastry out and put in a greased 20cm spring form pan or you can use a pie dish. Something with deep sides.
2. Mix together - condensed milk, eggs, water, cinnamon, raspberries and apple. Pour over pie crust.
3. Mix together brown sugar, flour and butter until it resembles bread crumbs. Sprinkle over custard mix.
4. Bake in the oven for 10 minutes on 200C. Then turn down to 180C and bake for 40 minutes or until brown and crusty on top.
5. Let cool and then put in the fridge. I recommend you eat it cold because it's easier to cut and the custard will firm up nicely.
Serve with ice cream or cream or whatever you like.
and no i didn't eat three pieces. *nervous laugh*
Saturday, January 01, 2011
Tutorial : Jeans to a skirt
I was given a pair of high waisted 'mom' jeans. And even though i AM a mum these are hideous and i would never in a million years wear them. I did try them on and the waist was up near my boobs. So ya. Hideous. SO i decided to make them into a skirt. Why waste good demin, right?
So here's the jeans - a lovely 15 inches from crotch to waist
Now for the waist. Grab and old t-shirt and cut about 7 inches off the bottom. Measure around your waist about an inch below your belly button. Take that measurement and subtract off 1-2 inches. Join the seams at the end.
double it over and pin it to your skirt. Since you are pinning on stretchy material, pin the front, back and sides first and then stretch the rest of the fabric around. Sew.Saturday, December 25, 2010
Fruit Cake Truffles
Merry Christmas everyone! to get in the Christmas spirit this year i decided to make Fruit Cake Truffles instead of Oreo Truffles. Same principle, slightly different ingredients.
You will need -
-1 packet of Philadelphia Cream Cheese (i use light to try and counter-act the effect of the chocolate ;) )
-3/4 of a fruit cake. - i just buy a Homebrand dark fruit cake. You could use light if you wanted too.
- 2 blocks of chocolate for dipping. I like Dairy Fine from Aldi.
- Crumble the fruit cake into a bowl. Then add your cream cheese. Beat until it resembles cookie dough.
- Roll into balls and place on a tray. I use a small melon baller to help me get even size balls.
- Refrigerate until they are firm.
- Dip in melted chocolate and place on a tray that has been covered in baking paper.
- Make it fancy by sprinkling on crushed candy cane, choc sprinkles or drizzle with white chocolate. You can even roll them in coconut. Whatever takes your fancy. I also like adding essences to my dipping chocolate - so in mine i did some orange, some peppermint and some plain. Have fun and be creative!
Friday, December 17, 2010
Saturday, November 27, 2010
Monday, October 11, 2010
Thursday, September 30, 2010
I was standing in the kitchen eating my lunch when i looked out in the backyard and there were 2 pale-headed rosellas walking around! I RAN to get my camera. I am so glad i was able to get a good pic this time! SO EXCITED!!

And thank you Graham for not mowing for a while because they were feeding on the dandelion flowers.
Wednesday, September 29, 2010
Australasian "Green" Figbird

I was very excited to see this one because i didn't know what it was. lol The common everyday birds like crows and magpie aren't very exciting. It took me a little while to identify but i'm pretty sure this is a male Green Figbird. I took a ton of pics but this was the best one. Very hard to take pics at such a distance. Another Figbird came and they had a midair fight. Unfortunately i wasn't quick enough with the camera to take a pic.
Tuesday, September 28, 2010
BIRDS!
I've decided to take photos of all the birds i see so these are some of them. I need to get photos now of the ones i've observed but didn't capture.
-Darter

-Silvereye
- Rainbow Lorikeet
Pale-Headed Rosella
- Kookaburra
Eastern Great Egret
Blue-faced Honeyeater with a Noisey Miner
Blue-faced Honeyeater with a Noisey MinerI'll post more birds as i see them. It's amazing that i never really noticed how many birds there are around until i started birdwatching. I go out in my backyard and the air is full of bird calls. It's so beautiful!
Saturday, September 18, 2010
Bird Watching
Over the last few weeks i've started bird watching. It's so fun!! I was inspired by some friends who do it and so i bought a field guide and Graham bought some binoculars and then i found a check list on a website, so i've been finding birds and checking them off the list! Whenever we go somewhere i always take my field guide and my binos. Last weekend i found some King Parrots and Red-Browed Finches. They are so cute and beautiful. Today i saw a bird of prey - it was too far away and flying to fast for me to identify. But it was either a juvenile Periguin Falcon, a Little Eagle or some sort of Kite. I'm counting it as a sighting though!! lol So with that one today i have found 19 different birds in and around where i live.
I found a Kookaburra on my neighbours tv aerial. I need to take more pics of the birds i find.
Spring!
It's Spring although the last couple of days you wouldn't know it. It's been freezing! We had our fire going last night but unfortunately we only have 2 pieces of wood left so it will probably be rationed. Anyhow, since it's spring and we actually have water now and can water our gardens(by bucket after 4pm) i decided to have another go and planting a veggie garden. I bought a 'friend' for our lonely tomato plant and it is growing SO well. I swear it's doubled in size since i bought it last week. I also planted radishes and they have also sprouted! YAY! I love radishes in a yummy salad. I also seem to have sprouted another plant that is NOT a radish. It may be a cuccumber since i planted some of those too but they haven't sprouted. I just have this rouge seedling that is obviously not a radish come up with them. lol I guess we will just have to wait and find out what it is. :) Those are just in pots but i plan to dig up the bigger garden in the backyard soon :) Stay tuned!
Wednesday, September 08, 2010
Doily Do-over
I was blessed to be given several doilies from my Aunts mother-in-law after she passed away(the MIL not the aunt ;)) So what is one to do with so many doilies? I am not really a doily person. I think they are beautiful works of art and as a crochet-er i appreciate the work that goes into them so i didn't want to waste them or give them away. Some of them are just gorgeous! I've seen cute things been done with doilies on blogs so i thought i would give it a go to do a Doily Do-over!!!
And so i made a shrug. I have never had a shrug and i'm not even su
re i'm a shrug person but i think i can become one with just the right clothes to go with it and maybe if i lost a little weight so i don't look like a quarterback.
I had 4 rectangle doilies that were just the right size. 2 longer one
s for the front and 2 shorter ones for the back.
I sewed them together carefully on my sewing machine with black thread because i was going to dye them since 2 were white and 2 were cream. And thread sometimes doesn't dye so i went with black instead of white. I sewed them down the back, sides and shoulders.
Then i dyed it. It didn't come out black but it did come out this nice greyish blue which i actually really like.
Then i sewed on some velvet black ribbon.
And voila! one doily shrug.
Wednesday, July 28, 2010
Wednesday, June 30, 2010
Singed Flower Hair Accessory Tutorial
- Candle
- Scissors
- Tweezers
- Organza or Chiffon or other synthetic fabric
- Needle and thread
- Beads or brads
- Matching felt
- Elastic, bobby pins or clips
Step 1. Cut circles of fabric. About 4 or 5 pieces depending on how full you want your flower to be. My pieces start from about 2.5cm(1inch) and the biggest is about 9cm(3.5in).
Step 4. Sew together. Get some matching thread or you can use invisible thread and sew them together in the middle. Just a couple of stitches and then you can thread on some beads and secrure them with a couple more stitches. DONE! almost.....
Step 5. Cut 2 pieces of felt - one circle and one rectangle that will fit inside the circle. Sew down two sides as shown to make a little 'tunnel'. That's for elastic or clip to go in.

Step 6. Hot glue it to the back of your flower.
VOILA!!
And if you are feeling adventurous you can even make baby ones and do something like this -
Try it with different fabrics and colours. You can also use them to accessorize your clothes if you want.
I made this one out of ribbon for my 6yr old niece and used brads in the middle instead of beads.
Subscribe to:
Posts (Atom)
